Anatomy of a Shoe – Features of Footwear
Let’s take a walk through the various components that make up a shoe and how exactly they affect our feet.
The two biggest parts of a shoe are the upper and the sole, essentially the top and bottom halves of the shoe.
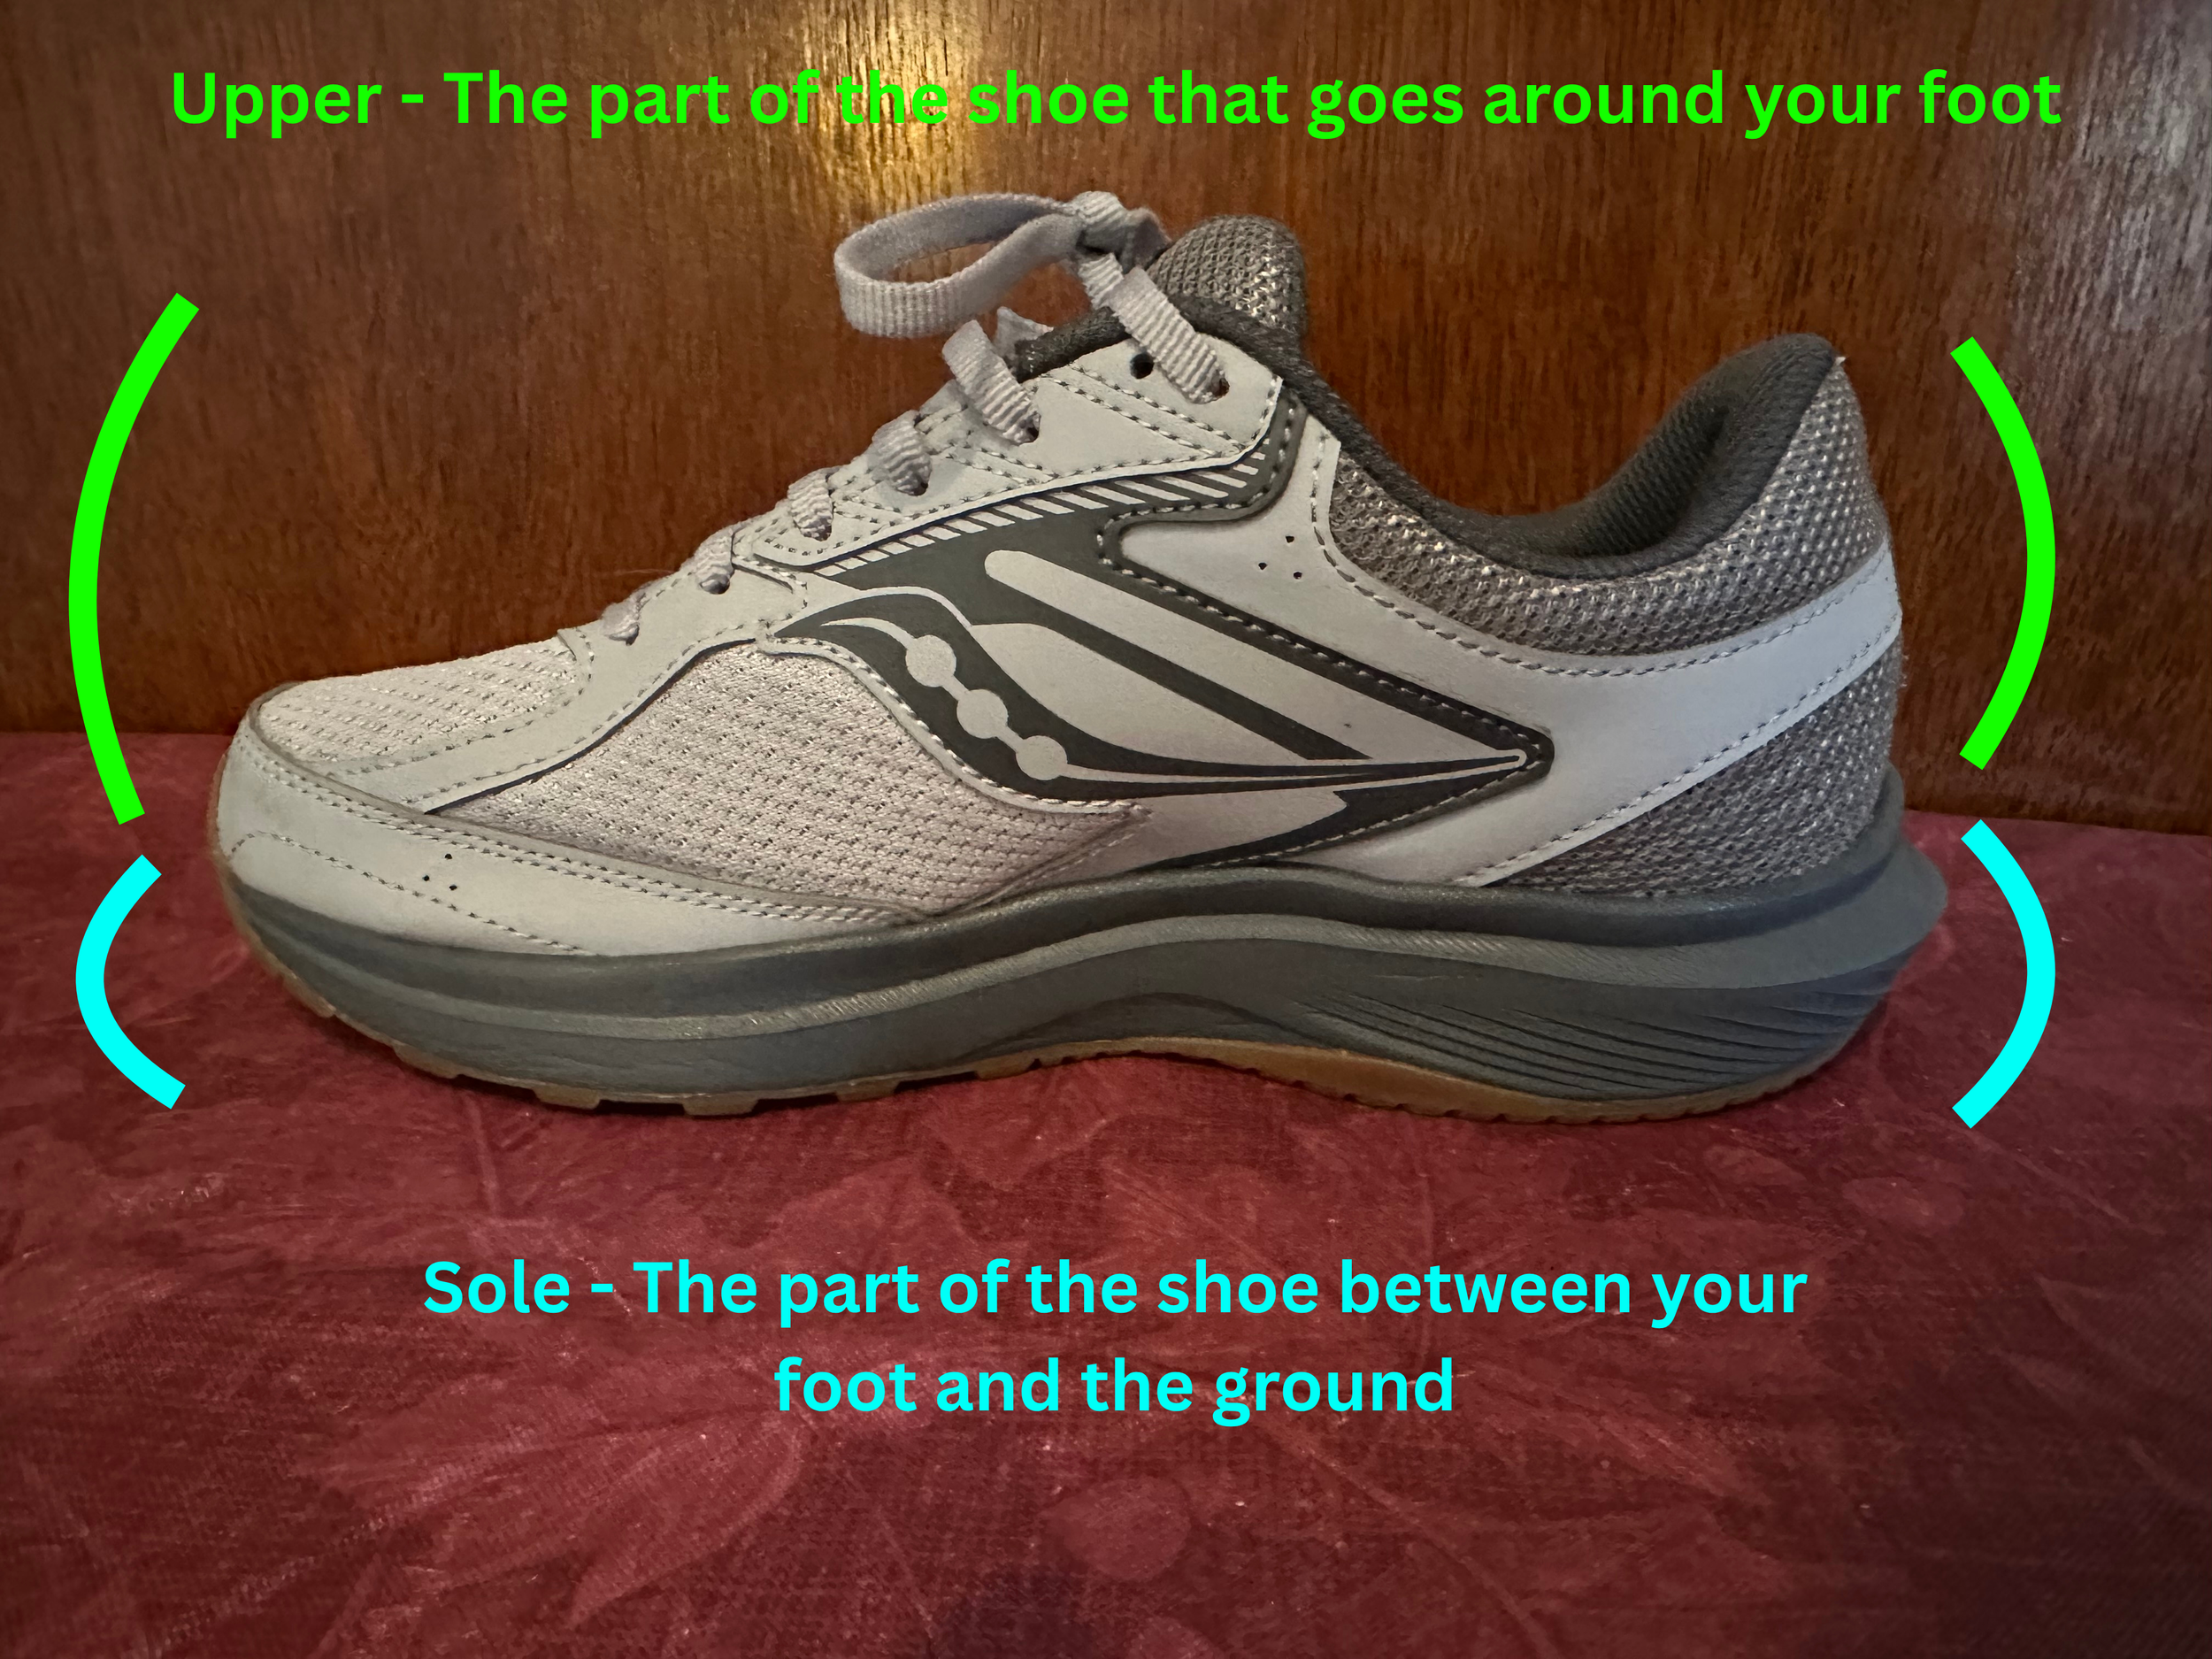
The upper of the shoe, highlighted in green, is typically made of leather, canvas, or textiles with plastic reinforcements. It surrounds the foot and provides coverage and some support. The sole, highlighted in blue, separates the foot from the ground, provides traction, and also provides support.
The sole is what your foot rests upon, it provides support and separates you from the ground. The sole can be separated into the outsole, insole, and midsole.
Outsole – The portion of the sole closest to the ground, often with a tread on the bottom surface. The more aggressive the texture of the tread the more traction it will provide.
Insole – This is the portion of the sole that is directly in contact with your feet. It often provides some cushioning and shock absorption. Some insoles can be easily removed, this is often an important component of orthopedic footwear, as the insole is often removed to make space for custom orthotics.
Midsole – The material between the outsole and the insole. This rather unassuming description downplays the fact that this is where a lot of the support and cushioning that the shoe provides comes from. Some midsoles are quite flexible and offer little support to overpronating feet: if you can wring the shoe out like a sponge it won’t provide you with much support. Midsoles may also be cushioned, check underneath the insole to see if you can squish your thumb into the exposed midsole material. Cushioned midsoles can offer beneficial shock absorption and cushioning to high arched feet or for folks who have to spend a lot of time on concrete, hospital, or classroom floors.
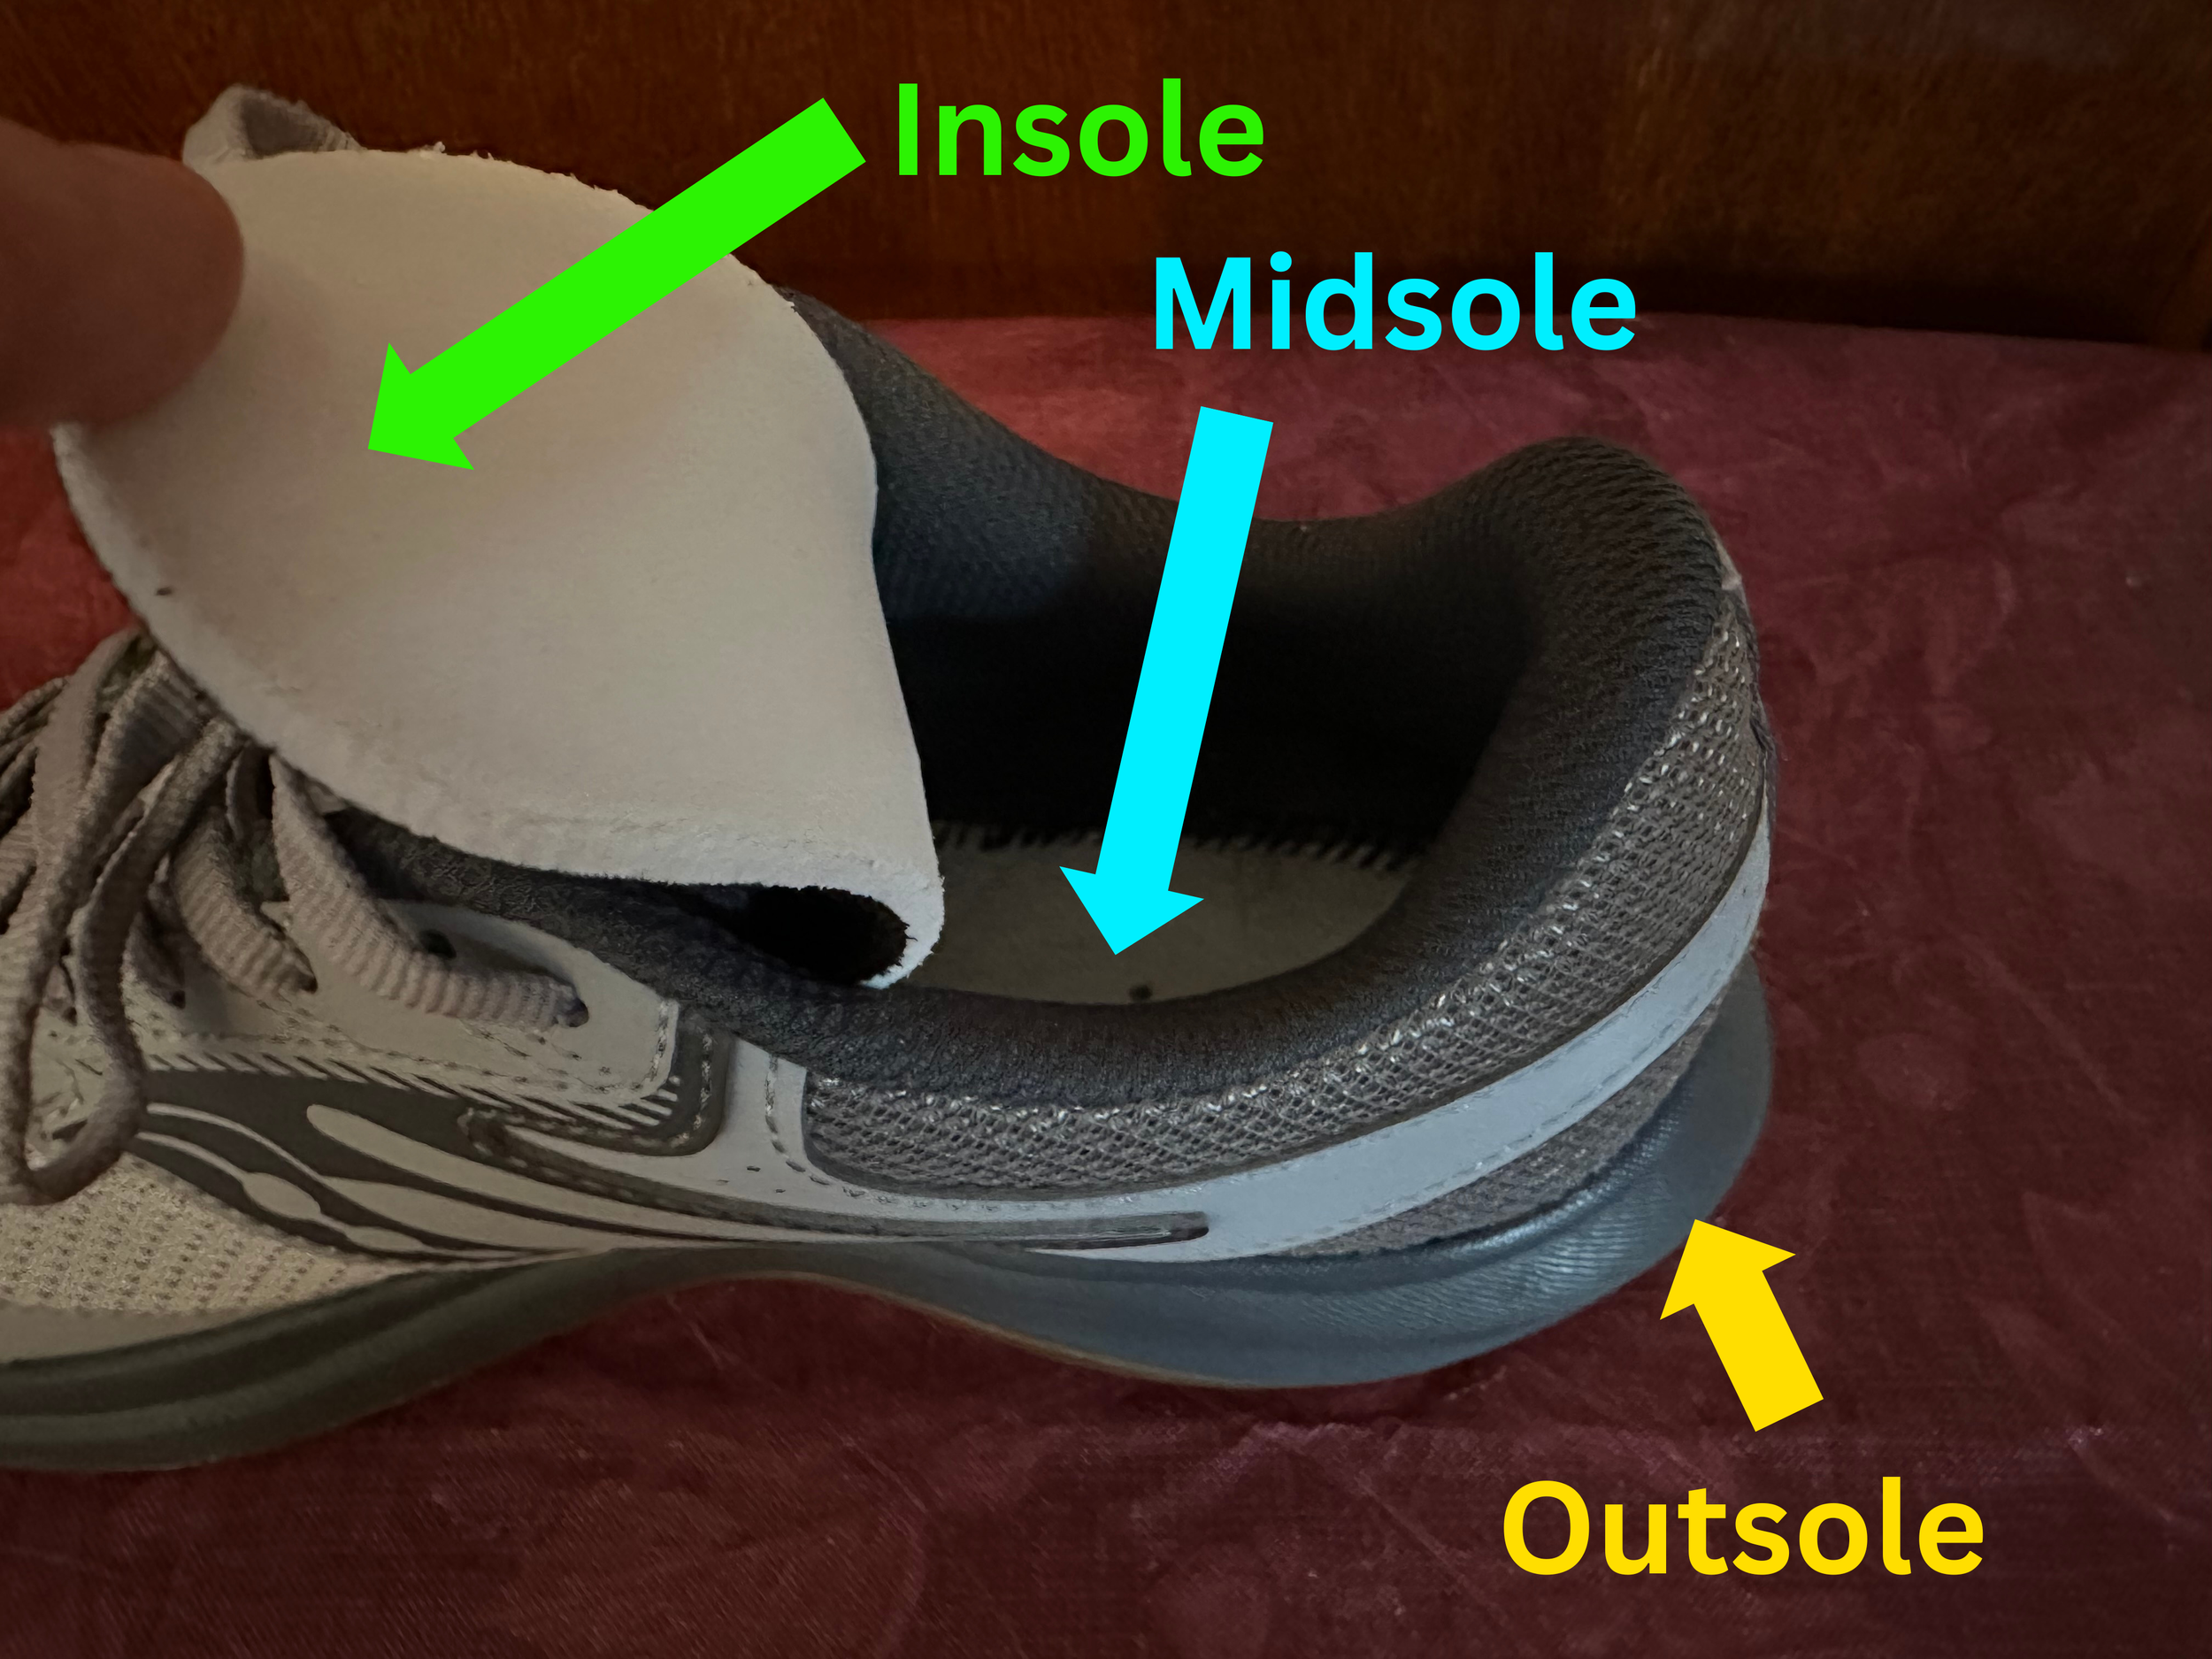
The insole (green) lifted up to reveal the midsole inside of the shoe (blue) with the external outsole (yellow) visible on the outside of the shoe.
Rockers – A final note on soles is that the toe of most shoes have some amount of rocker built into them. This is a curve that helps your body transition over your toes when you go to finish a step. A firm forefoot rocker combines this curve with a decent amount of rigidity that will limit the amount that your toes extend while you walk and help offload the ball of your foot while you are walking. This can be especially helpful for folks with bunions, arthritis, or limited padding in the ball of the foot.
The empty space inside the shoe and the hole itself where you insert your foot don’t seem to have fancy names. Since I want to refer to that hole area I’m going to refer to it as the Marianas since that sounds pleasing to me.
The upper is everything on top of the sole that surrounds your foot. The top line of the upper surrounding the Marianas is, fittingly enough, called the topline or collar. The front half of the upper is called the vamp and it extends from the toes to the front edge Marianas. Thus the vamp also includes the tongue and lacing area on top of the shoe. The back part of the shoe is called the quarter; it contains the rest of the Marianas and the collar which is often padded for comfort.
From the rear of the shoe to the front, we have a few special areas of interest: the heel counter, the eyelets, and the toe box.
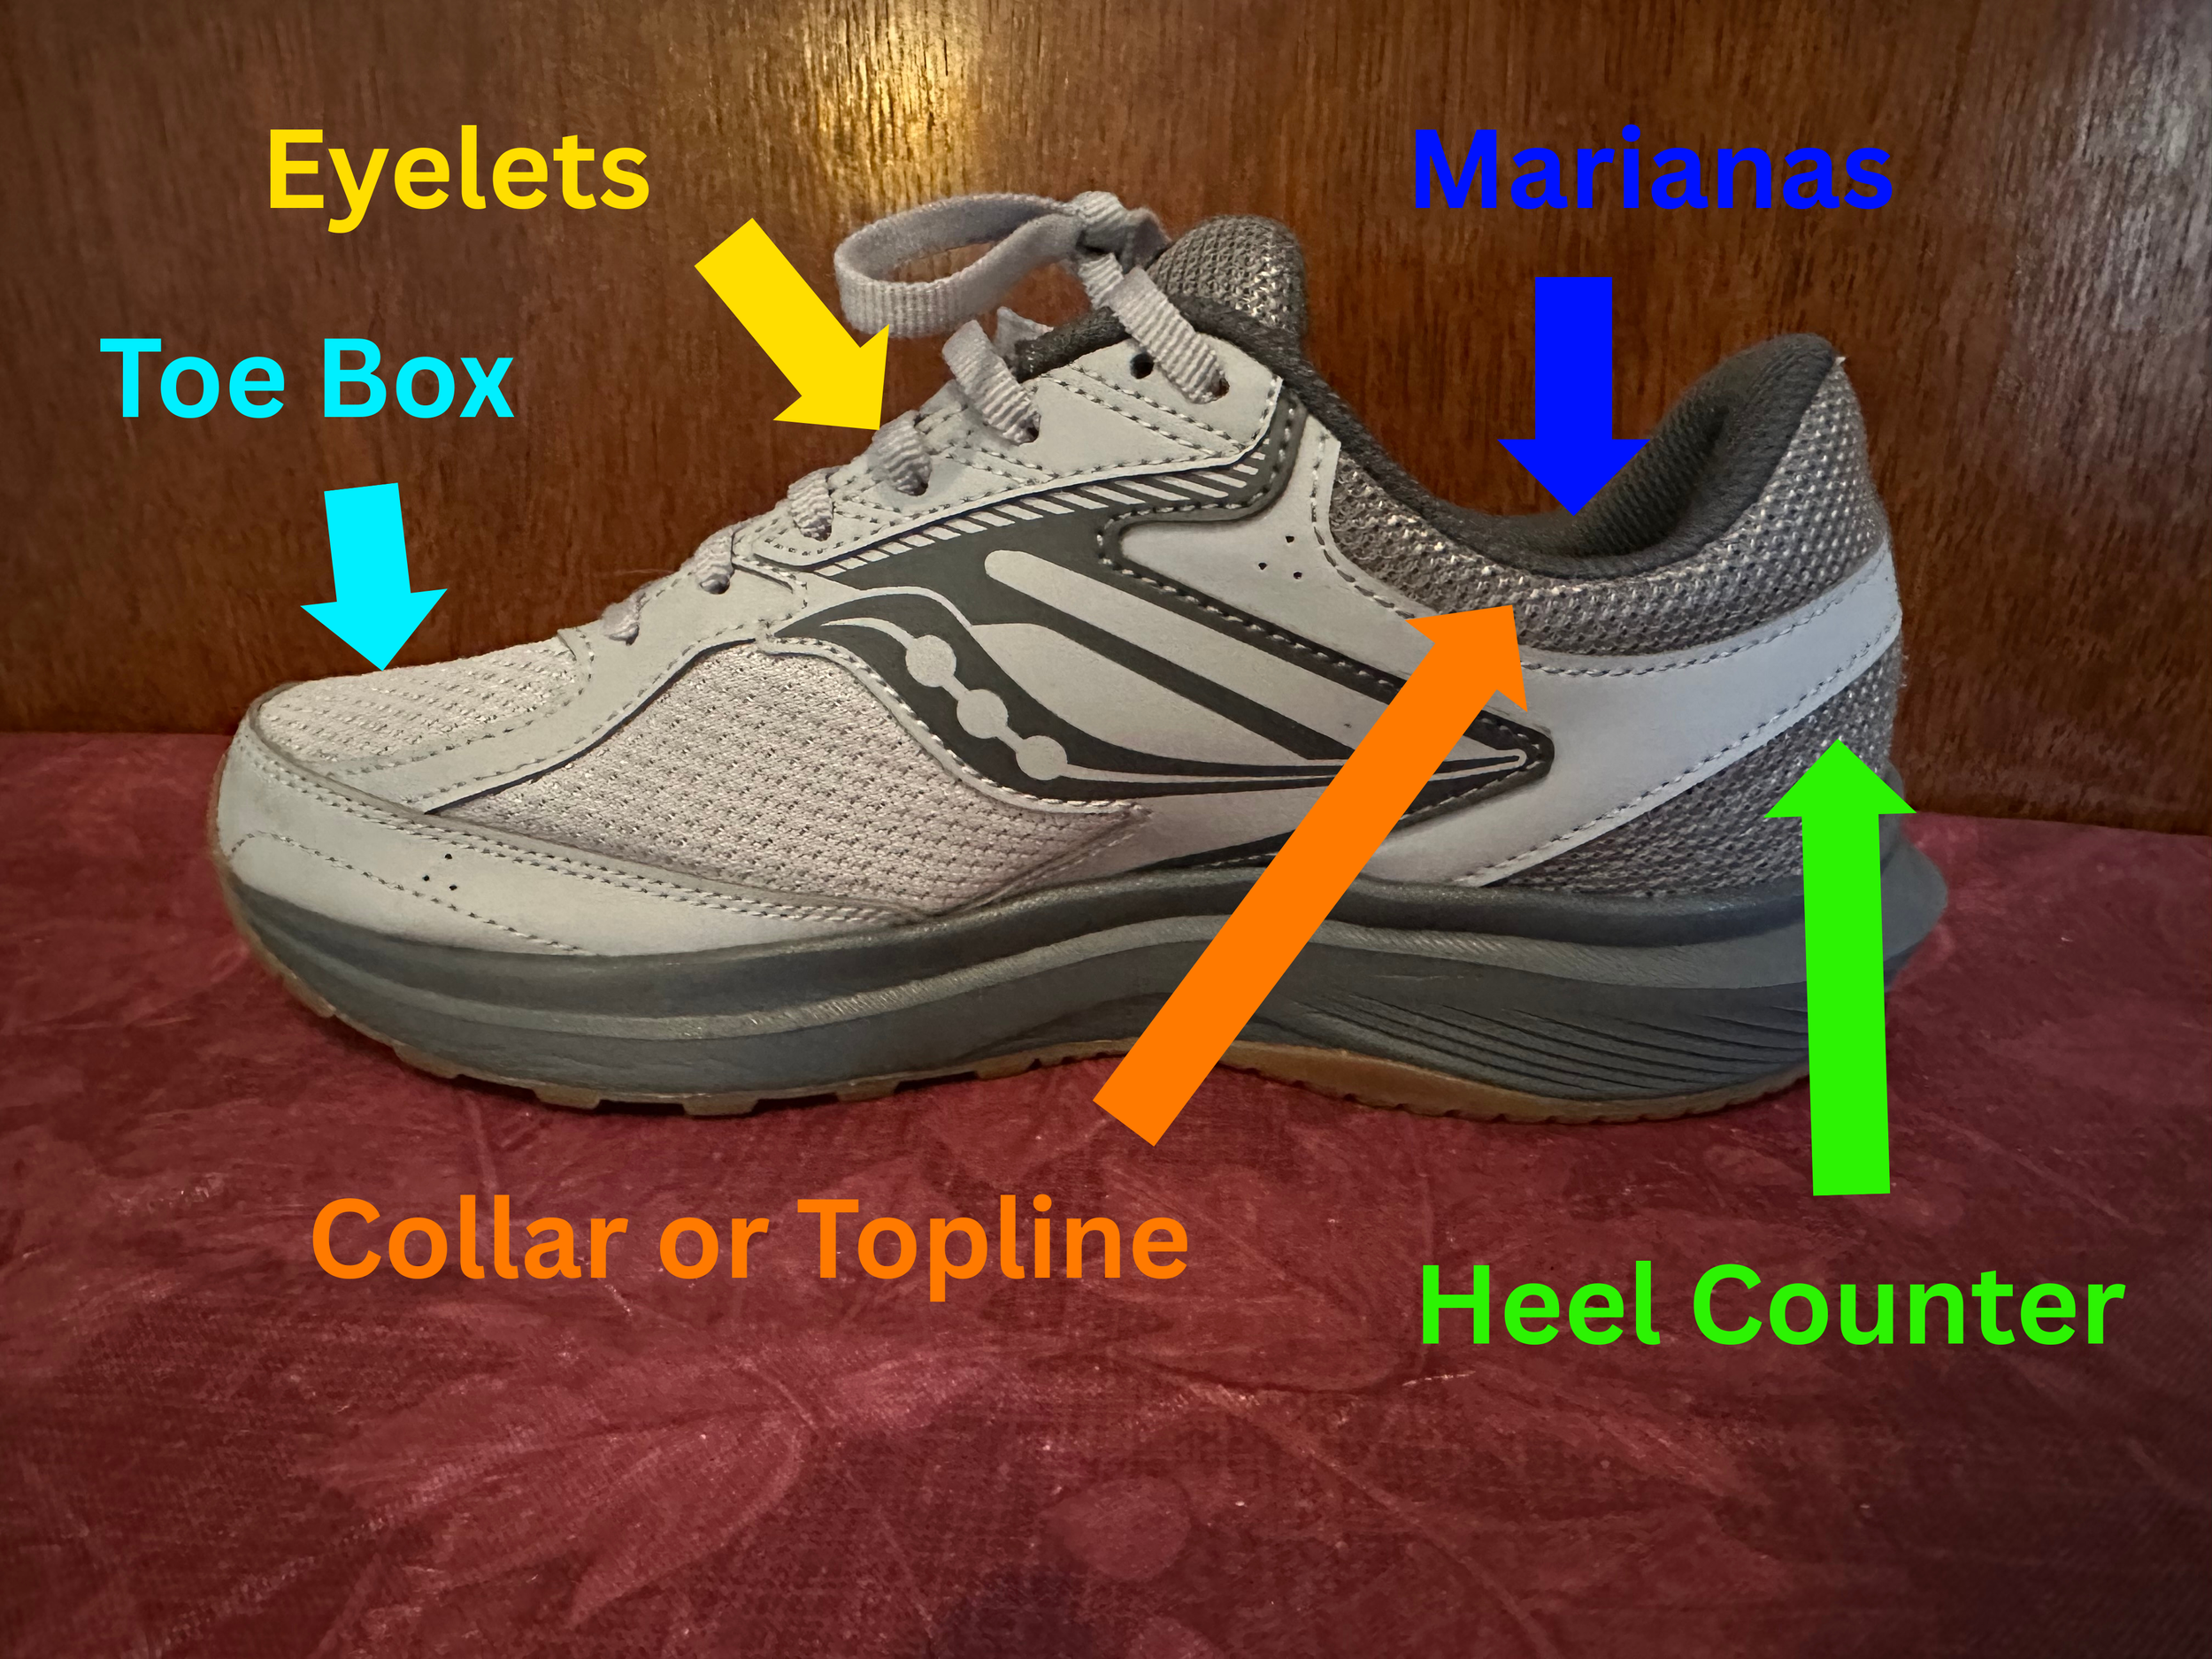
The heel counter (green) supports the rearfoot. The collar or topline (orange) surrounds the Marianas (dark blue) which is the hole the foot is inserted into. The eyelets (yellow) are the attachment point for the laces. And finally the toe box (blue) provides space and covering for the toes.
Heel Counter – this is a horseshoe or clamshell shaped piece of material that surrounds the heel. In folks who overpronate a very stiff heel counter can provide quite a bit of needed support as the rearfoot tries to rotate under loading. When evaluating a heel counter you need to get in there and really feel for it since lots of shoes have decorative stitching that looks like a heel counter but crumples as soon as you grab it firmly in your fist.
Eyelets – these are the holes that you run your laces through. Specifically, we are looking at this extra pair of eyelets behind and above where the laces stop that are present on some types of shoes, mostly runners. I have personally had good results by simply skipping the laces up to that higher eyelet, it helps make the heel feel a bit more secure in shoe and it doesn’t piston up and down as much. All four of those upper eyelets can be used in a more complicated fashion to ‘lock lace’ the shoes providing an even more secure fit.
Toe Box – this is the shape of the toe of the shoe. Some are rounded, some are square, some are pointed, and some are deeper up and down than others. As a pedorthist I have to share the unfortunate news that pointed toe footwear are generally not a positive for your feet. If you are particularly lucky in your foot mechanics pointed toe shoes might not cause you any problems, but typically they squish the toes together which can contribute to nail problems, pain, and the formation of bunions. Give your toes a decent amount of width and depth if the aesthetic requirements of your footwear at all allow it.
A Canadian Certified Pedorthist is a great resource for finding out precisely what kinds of features you should be looking for in a shoe personally. If you have any questions about anything discussed during this brief little stroll feel free to reach out to us at:
appointments@barkspedorthics.ca
519-717-3464.